

Last updated on October 17, 2025 at 10:53 AM
Would you like to track GA4 page load times? GA4’s lack of ‘Site Speed’ data may confuse Universal Analytics users. GA4 does not give page timing or page load times. GA4 may provide loading time measurements. Let’s use Google Tag Manager to record page loading times in Google Analytics.
To proceed, ensure that you have implemented Google Tag Manager (GTM) and have set up a GA4 configuration tag in your GTM container. It should be noted that implementing GA4 through GTM is not a requirement. It is possible to monitor page speed through GTM in GA4, provided that the GA4 tag was initially installed directly into the website backend.
Step 1: Variable
To access the Tag Manager backend, please navigate to https://tagmanager.google.com/ and log in. Proceed to access the Variables segment located on the left-hand side. To create a new custom JavaScript variable, access the User-Defined Variables and select the “New” button.

To configure the variable, select “Variable Configuration” and opt for “Custom JavaScript” as the variable type.

The variable can be renamed as “Page Load Time” and the code can be incorporated into the custom JavaScript.
Custom JavaScript Code:
function() {
	if (window.performance && window.performance.getEntriesByType) {
		var entries = window.performance.getEntriesByType("navigation");
		if (entries.length > 0) {
			var navTiming = entries[0];
			var pageLoadTime = navTiming.loadEventEnd - navTiming.startTime;
		return Math.round(pageLoadTime / 100) / 10;
		}
	}
}
Step 2: Triggers
To create a new trigger, access the “Triggers” section and select the “New” button

To configure the trigger, select “Window Loaded” in the “Page View” category after clicking on “Trigger Configuration”.

The trigger may be renamed as “Page Loaded” and subsequently saved.

A second trigger will be created. The GA4 event tag will be conditioned on a trigger that restricts its firing to cases where the custom JavaScript variable returns a value greater than or equal to zero.
To create the second trigger, please access the “Tiggers” section located on the left-hand side and select the “New” button. Select “Custom Event” as the trigger type currently required.
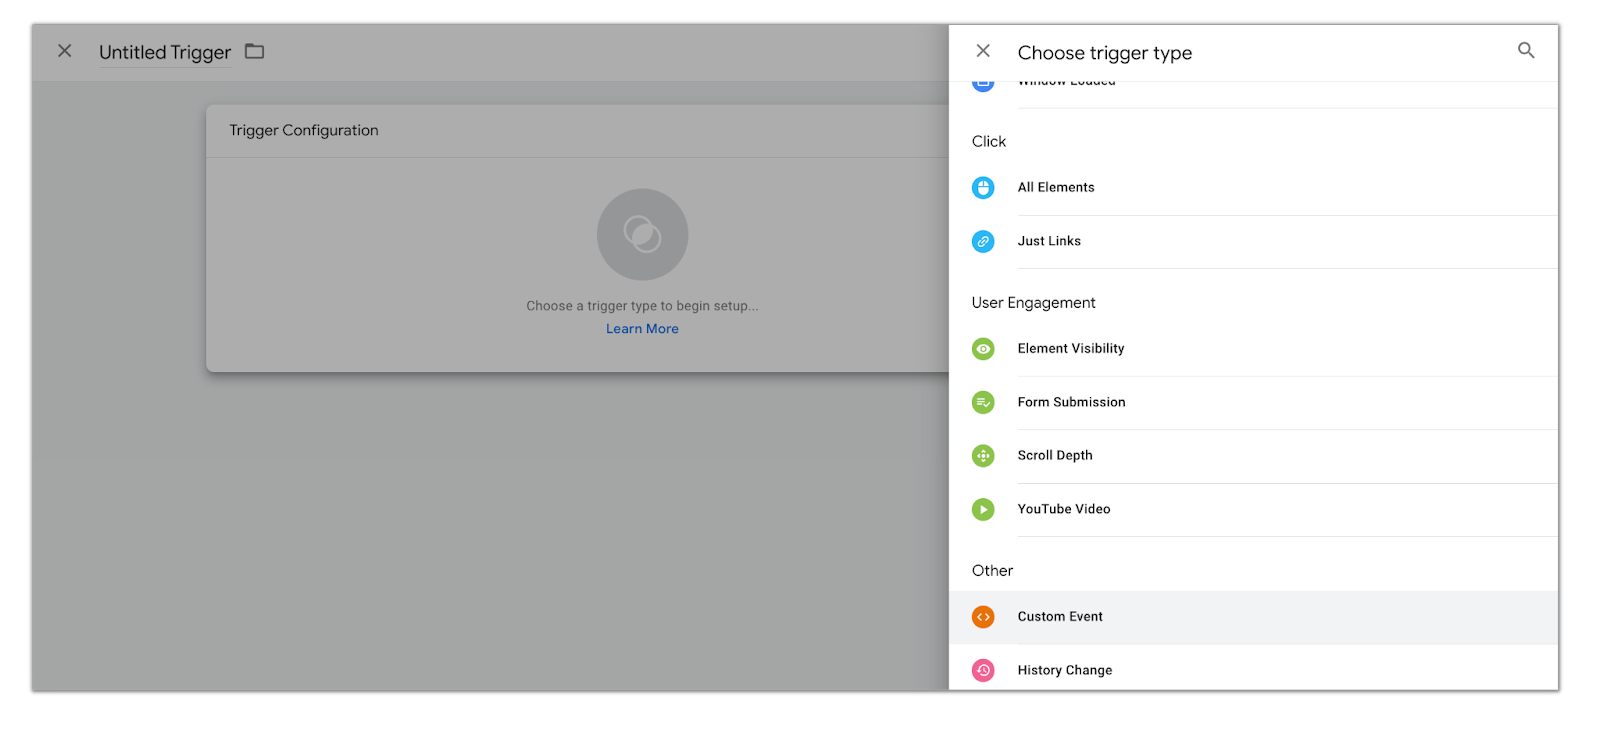
The configuration of the “Custom Event” can be initiated by clicking on it. It is recommended to assign the event name as a regular expression pattern “.*” and utilize regex matching. Choose “Some Custom Events” as the trigger option. Select the previously configured “Page Load Time” metric and apply the condition “less than 0”. Finally, the trigger can be renamed as “Page Load Time Less Than 0” and saved.

Step 3: Tag
With the Custom JavaScript variable in place to capture page loading time and the triggers set up, the next step is to generate the GA4 event tag. The implementation of this tag will facilitate the transmission of page loading time data to Google Analytics 4.
To create a new tag, access the “Tags” section and select the “New” button.

To configure the tag, select “Tag Configuration” and opt for “Google Analytics: GA4 Event” as the tag type.

The initial step is to select the configuration tag. The “None-Manually Set ID” option can be chosen in case the GA4 tag was implemented directly to the website backend instead of GTM. The Measurement ID can be manually entered. The event name can be designated as “page_load_time”. The final step entails entering “loading_time_sec” in the “Parameter Name” field and “{{Page Load Time}}” in the “Value” field.

Select “Triggering” and designate the previously established “Page Load” as the “Firing Triggers.” Then, select the “Page Load Time Less Than 0′” that was previously set as the “Exceptions.”

Step 4: Parameter
After the creation of the custom page_load_time event, the next step is to perform the registration of the loading_time_sec parameter in GA4. Access to edit or admin permission in Google Analytics is required to perform this task. Accessing the ‘Admin’ section and selecting ‘Custom Definitions’ will enable us to generate a novel custom metric that incorporates the parameter value for utilization in our reports.


Step 5: Test and Publish
The conclusive measure entails evaluating the tag, triggers, and variable within your GTM container. The GA4 platform is receiving the value for page loading time.

Upon completion of the necessary steps, the container can be published. Page loading time will be tracked in GA4 going forward.
Step 6: Using Looker Studio
To begin, generate a report and establish a connection between your GA4 property and Looker Studio. Please proceed with generating a table and incorporating your favored dimension based on pages. The ‘Page Path’ metric was utilized, although alternative options are also available. Two potential metrics to consider are “Count Page Load Time” and “Average Page Load Time.”

A filter should be added to the chart to account for instances where page views were recorded without the page load time tag being triggered. In the event of modifying the trigger, it is recommended to exclude firing on each page, in case of an error occurrence, or if the page load time is evaluated as zero seconds or less.
A filter can be generated and implemented on the chart via Looker Studio.

Page load time data analysis
When conducting an analysis of page load time data, it is advisable to take into account the following factors:
Perform an analysis to identify web pages with slow loading times. Identify web pages that exhibit load times exceeding the mean duration of your website. It is recommended to optimize these pages in order to enhance the user experience and minimize bounce rates.
Analyze pages with high traffic. It is recommended to prioritize optimization efforts on web pages that exhibit high traffic volume, as they tend to have a more pronounced effect on the overall performance and user experience of the website.
Incorporate user feedback into the analysis process. Analysis of user surveys and feedback can aid in the identification of particular pages or elements that could be adversely affecting the user experience because of slow load times.
Recommendations for optimizing page load speed
The following recommendations can be implemented to improve page load times:
Perform image optimization. Optimize file sizes and select the optimal format (such as WebP, JPEG, or PNG) based on the content and browser compatibility.
Optimize resource size through minification and compression techniques. Apply file size reduction techniques such as minification of HTML, CSS, and JavaScript files by eliminating redundant characters. Additionally, utilize gzip compression to further decrease file sizes.
Optimize website performance by implementing browser caching. Define caching protocols to enable web browsers to cache and reuse previously fetched resources, thereby decreasing subsequent page loading durations.
Utilize a content delivery network (CDN). Content delivery networks (CDNs) facilitate the distribution of content across various servers, thereby enhancing user accessibility based on their geographical location.
Through the examination of page load time metrics in Google Analytics and the implementation of optimization tactics, it is possible to improve website functionality and enhance the user experience. This can result in heightened engagement and conversion rates.